How To Create a Simple Chrome Extension

Chrome extensions are a great way to give repeat website visitors quick access to your content and micro-apps that provide simple functionality relating to your business.
The following steps explain how to create a simple Chrome extension with an easy to follow example.
1. Create a square logo to launch your extension in Chrome.
2. Create a Json manifest file to hold the configuration for your extension.
3. Create a html page to hold the layout of your extension.
4. Add CSS to your html page to style your Chrome extension app.
5. Test your Chrome extension in your local browser.
6. Publish your extension to the Chrome store.
In this easy example of how to create a Chrome extension we are going to build a Content Launcher for a website with quick links to access Social platform content.

Create a Logo Image for Your Chrome Extension
Your extension will need a logo image to act as a launcher in the Chrome extension tray:
Create yourself a .png logo with a size of 150x150px and name it icon_150.png. Next, create a new folder to hold the files for your Chrome extension and save your new icon into it.
You need your icon in 3 sizes, so the next step is to resize your icon to 128x128px and save it into your new folder as icon_128.png. Finally, resize your icon again to 19x19px and save it as icon.png. You should end up with a folder that looks like this:
Create a Chrome Extension Manifest File
A manifest file holds simple configuration instructions for your Chrome extension in Json format.
For our simple Chrome extension example we are going to specify the following:
- Extension name and short description.
- A version number.
- Details of icons and HTML pages.
- Any browser access permissions we may want to request from the user for the extension to work.
You can use the following example of a Json Manifest file to create one for your Chrome extension. Once created, save your manifest file into your working folder and call it manifest.json.
{ "manifest_version": 2, "name": "SG Digital Launcher", "description" : "Quick launch SG Digital", "version" : "1.0.0", "icons":{"128": "icon_128.png"}, "browser_action":{ "default_icon" : "icon.png", "default_popup" : "launcher.html" }, "permissions":[ "activeTab" ] }
Add a Chrome Extension HTML Page
Chrome extensions are written using regular HTML, CSS and Javascript, making them easy to create by web developers. In our simple Chrome extension example we are going to create the following basic HTML document and add some links to a website and its social media pages:
<!DOCTYPE html> <html lang="en"> <head> <meta charset="UTF-8"> <meta name="viewport" content="width=device-width, initial-scale=1.0"> <title>SG Digital Launcher</title> <link rel="stylesheet" href="https://fonts.googleapis.com/css?family=Open+Sans" type="text/css"> <link rel="stylesheet" href="https://use.fontawesome.com/releases/v5.14.0/css/all.css" integrity="sha384-your-key" crossorigin="anonymous"> </head> <body> <div class="modal__header"> <h1 class="modal__header__logo"> <img src="images/logo_150.png" alt="SG Digital Logo" class="modal__header__logo__icon">SG Digital Launcher<span class="modal__header__logo__icon__version">(1.0.0)</span> </h1> </div> <div class="modal__content"> <p>Easily access SG Digital content</p> </div> <div class="modal__icons"> <div class="flex-container"> <div class="flex"> <a href="https://www.stephengarside.co.uk" target="_blank" title="Visit SG Digital Website" class="modal__icons__link"> <i class="fa fa-globe"></i> </a> </div> <div class="flex"> <a href="https://www.youtube.com/channel/UCjsbYX2B9VLh78SnNvb4FDA" target="_blank" title="Watch SG Digital on Youtube" class="modal__icons__link"> <i class="fab fa-youtube"></i> </a> </div> <div class="flex"> <a href="https://www.facebook.com/stephen.garside.100" target="_blank" title="Visit SG Digital on Facebook" class="modal__icons__link"> <i class="fab fa-facebook"></i> </a> </div> <div class="flex"> <a href="https://twitter.com/StephenGarside1" target="_blank" title="Visit SG Digital on Twitter" class="modal__icons__link"> <i class="fab fa-twitter"></i> </a> </div> <div class="flex"> <a href="https://g.page/sg-digital-software?gm" target="_blank" title="SG Digital Google My Business" class="modal__icons__link"> <i class="fab fa-google"></i> </a> </div> <div class="flex"> <a href="https://uk.linkedin.com/in/stephen-garside-6556882a" target="_blank" title="Connect with SG Digital on LinkedIn" class="modal__icons__link"> <i class="fab fa-linkedin"></i> </a> </div> <div class="flex"> <a href="http://stackoverflow.com/users/4629440/stephen-garside" target="_blank" title="Visit SG Digital on Stackoverflow" class="modal__icons__link"> <i class="fab fa-stack-overflow"></i> </a> </div> </div> </div> <script src="custom.js"></script> </body> </html>
A few things to note are the use of external font and icon files and a reference to a custom javascript file (popup.js). In this example the custom.js file is not used but I have included it to show how to include javascript in your Chrome extension.
Go ahead and create your Chrome extension HTML page, substituting the links for your own before saving it into your working folder as launcher.html.
Add Chrome Extension Styling
You maybe wondering where the CSS style is for your HTML document. The styling for a Chrome extension works in exactly the same way as a web page by utilising CSS.
Here is the CSS I used for my simple Chrome extension example. Go ahead and add this to the <head> section of your launcher.html file.
<style> html, body { font-family: 'Open Sans', sans-serif; font-size: 14px; margin: 0; min-height: 180px; padding: 0; width: 384px; } .modal__header { align-items: center; border-bottom: 0.5px solid #dadada; } .modal__content { padding: 0 22px; } .modal__icons { border-top: 0.5px solid #dadada; height: 50px; width: 100%; } .modal__icons__link, .modal__icons__link:visited { color: #000; outline: 0; text-decoration: none; } .modal__header__logo { font-family: 'Menlo', monospace; font-size: 22px; font-weight: 400; margin: 0; color: #000; padding: 16px; } .modal__header__logo__icon { vertical-align: text-bottom; margin-right: 12px; width: 30px; } .modal__header__logo__icon__version { color: #444; font-size: 18px; } .flex-container { display: flex; justify-content: space-between; padding: 10px 20px; } .flex { opacity: 1; transition: opacity 0.2s ease-in-out; width: 120px; } .flex:hover { opacity: 0.4; } .flex .fa, .flex .fab { font-size: 32px; color: orange; } </style>
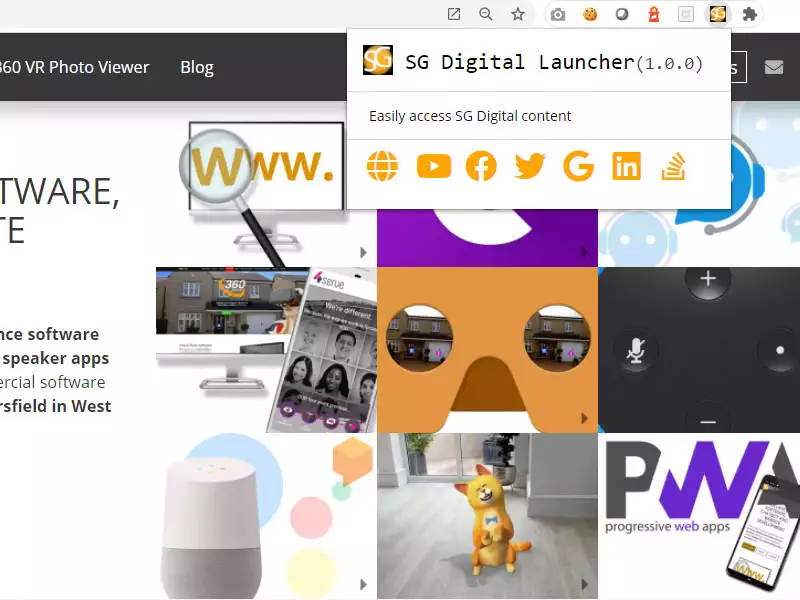
How to Test A Chrome Extension Locally
The working folder for your Chrome extension should now be looking like this:
Testing your simple Chrome extension is easy. Open a new tab in Chrome and enter the following in the URL field chrome://extensions/
Next, click the Load Unpacked button and select your working folder when prompted.
This action will load your extension locally and allow you to launch, test and adjust it until you are happy and ready to deploy it to the Chrome web store.
Submit Your Extension to the Chrome Web Store
Once you are happy with your Chrome extension, the final step is to upload it to the Google Chrome Web Store. You will need to register as a Chrome Web Store Developer first, and also pay a one off 5$ fee before you can submit your extension for review.
Google provide simple to follow instructions to publish your Chrome extension, so I won't go into those here, suffice to say you .zip up your working folder and upload it to the store for review.
Depending on the complexity of your extension it can take a day or so before it is published to the web store, but for simple Chrome extensions its just a few hours.

If you are wondering how to create and publish a simple Chrome extension then I hope this article has helped you.
You can get the source code for the SG Digital Quick Launcher Chrome extension from our GitHub repo titled easy Chrome extension example code.
If you want a local Chrome extension developer to create an experience for your business then please get in touch!